The bar is low. It looks complicated, but it’s not. This is the reality to get started making your own AI models:
Math: None. Really.
Data: You can go miles with only 50 items.
Computing power: You can get state of the art computing for free.
Experience: If you can write basic code and understand what a function is, you’re ready.
Just kidding–these aren’t the real requirements. The real requirement is being okay with not understanding everything immediately. You’ll learn by doing first, understanding later.
When you play soccer, do you sit in a physics classroom or starting kicking a ball?
Let’s Kick the Ball
To get started:
Head to Kaggle, sign up, and verify your phone number (that’s how you get access to fancy GPUs)
Create a notebook
Then in the first cell, run !uv pip install ddg–this is just setting up the equipment in the soccer pitch
In 2015, this XKCD comic made a joke: distinguishing birds from non-birds in photos was “nearly impossible” for computers. Everyone laughed because it was obvioulsy true.
Let’s build that exact system, in minutes. If you think it’ll be hard, it’ll be hard. If you think it’ll be easy, it’ll be easy.
We’ll need to:
Get some data
Process the data
Fine-tune an AI model
Use the model
! uv pip install ddgs
Using Python 3.11.13 environment at: /usr
Resolved 17 packages in 370ms
Prepared 4 packages in 229ms
Uninstalled 1 package in 21ms
Installed 4 packages in 11ms
+ddgs==9.8.0
-lxml==5.4.0
+lxml==6.0.2
+primp==0.15.0
+socksio==1.0.0
import logginglogging.disable(logging.WARNING)
Step 1: Getting some Images
We need some images to teach the model what’s a bird and what’s a first.
Rather than manually searching for photos by hand, let’s programmatically do it.
First, let’s search for a single photo to make sure our search works.
from fastdownload import download_urlfrom fastai.vision.allimport*download_url(urls[0], 'bird.jpg', show_progress=False)im = Image.open('bird.jpg')im.to_thumb(256,256)
/usr/local/lib/python3.11/dist-packages/pydantic/_internal/_generate_schema.py:2249: UnsupportedFieldAttributeWarning: The 'repr' attribute with value False was provided to the `Field()` function, which has no effect in the context it was used. 'repr' is field-specific metadata, and can only be attached to a model field using `Annotated` metadata or by assignment. This may have happened because an `Annotated` type alias using the `type` statement was used, or if the `Field()` function was attached to a single member of a union type.
  warnings.warn(
/usr/local/lib/python3.11/dist-packages/pydantic/_internal/_generate_schema.py:2249: UnsupportedFieldAttributeWarning: The 'frozen' attribute with value True was provided to the `Field()` function, which has no effect in the context it was used. 'frozen' is field-specific metadata, and can only be attached to a model field using `Annotated` metadata or by assignment. This may have happened because an `Annotated` type alias using the `type` statement was used, or if the `Field()` function was attached to a single member of a union type.
  warnings.warn(
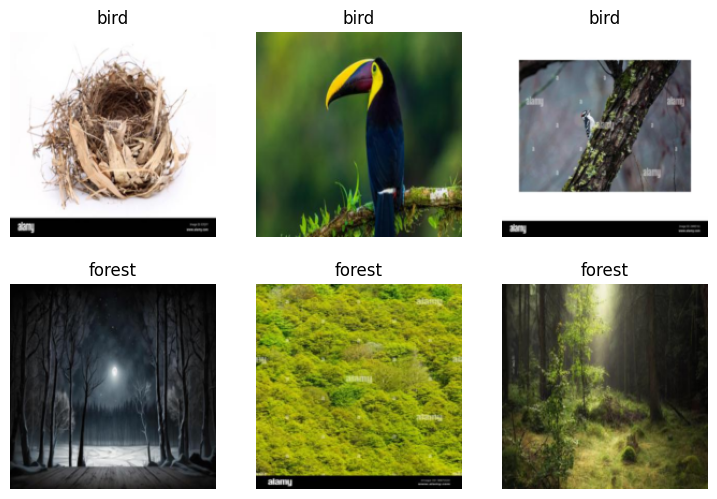
Now grab 200 bird photos and 200 forest photos (our ‘not bird’ category).
searches ='forest', 'bird'path = Path('bird_or_not')for o in searches: dest = (path/o) dest.mkdir(exist_ok=True, parents=True) download_images(dest, urls=search_images(f'{o} photo')) resize_images(path/o, max_size=400, dest=path/o)
Step 2: Create a DataBlock
Here, we’ll be performing a bunch of processes on the data.
Downloading: "https://download.pytorch.org/models/resnet18-f37072fd.pth" to /root/.cache/torch/hub/checkpoints/resnet18-f37072fd.pth
100%|██████████| 44.7M/44.7M [00:00<00:00, 149MB/s]
epoch
train_loss
valid_loss
error_rate
time
0
0.928233
0.830080
0.205128
00:10
epoch
train_loss
valid_loss
error_rate
time
0
0.421934
0.592662
0.153846
00:14
1
0.265431
0.519274
0.128205
00:14
2
0.191559
0.445995
0.102564
00:14
Done. You trained a model.
Step 4: Use the Model
im.to_thumb(256,256)
is_bird,_,probs = learn.predict(PILImage.create('bird.jpg'))print(f"This is a: {is_bird}.")print(f"Probability it's a bird: {probs[0]:.4f}")
This is a: bird.
Probability it's a bird: 1.0000
That’s it. From joke to reality.
What Just Happened?
Datasets and splits
We used DuckDuckGo to find image URLs, then downloaded them. You created your very own dataset.
searches ='forest','bird'path = Path('bird_or_not')for o in searches: dest = (path/o) dest.mkdir(exist_ok=True, parents=True) download_images(dest, urls=search_images(f'{o} photo')) resize_images(path/o, max_size=400, dest=path/o)
Machine learning models need two things: data to learn from (training set) and data to test accuracy (validation set). We split our 400 images 80/20:
splitter=RandomSplitter(valid_pct=0.2, seed=42)
The model never sees validation images during training. This tells us if it actually learned or just memorized.
DataBlocks and DataLoaders
A DataBlock is a block of data. It says “here’s how to handle my data”:
DataBlock( blocks=(ImageBlock, CategoryBlock), # what type of data get_items=get_image_files, # how to find it splitter=RandomSplitter(...), # how to split it get_y=parent_label, # how to label it item_tfms=[Resize(192, ...)] # how to transform it)
Think of it like a crate with items inside. The crate has a sticker informing us how to handle the items within.
Think of .dataloaders like the dude unpacking the crate.
DataBlock( ...).dataloaders(path, bs=32)
bs, short for batch size, tells the dude how many items to unpack from the crate and put at the shelf at any given moment.
More technically, DataLoaders turns this block into actual iterators that feed batches of data to your model during training.
Pre-trained models
You may have noticed that our vision_learner was passed resnet18. This is an already existing model, already trained on ImageNet—1 million images across 1000 categories. It already knows edges, textures, shapes, even some animals.
When you create a learner, fastai downloads those pre-trained weights automatically.
Fine-tuning
You’re not training from scratch. You’re adjusting an expert:
learn.fine_tune(3)
Models have something called weights. They guide the model to the correct answer. For our case, that’s bird or forest. In three loops, the model tweaks the weights so it getes better at determining what’s a bird and what’s a forest.
The model already knows “bird-like features.” You’re just teaching it: “these specific birds, not those specific forests.”
That’s why it can take 30 seconds instead of 30 hours.
Returns three things: the predicted label, the label index, and probabilities for each category.
The process, start to finish:
Collect data – Download images, organize into folders by category
Process Data – Tell fastai: input type, output type, how to find files, how to split, how to label
Load Data – Package the data into batches the model can consume
Create learner – Combine your data with a pre-trained model (like resnet18)
Fine-tune – Adjust the pre-trained weights to your specific task
Predict – Use the trained model on new images
This pattern works for almost any image classification problem. Different images, same steps.
Beyond Birds
The same six-step pattern works for completely different problems.
Segmentation – Label every pixel in an image by what it represents. Point at a road scene and the model colors cars brown, roads gray, buildings red, sky blue. Same process: organize pixel-labeled images, create DataLoaders, use a segmentation learner, fine-tune.
Tabular data – Predict outcomes from spreadsheets. Will this customer churn? What salary range fits these demographics? Organize your CSV, tell fastai which columns are categories vs numbers, create a tabular learner, fit. No pre-trained models here—every table is unique.
Collaborative filtering – Recommend products based on what similar users liked. “Users who rated movie X highly also liked movie Y.” Organize user-item-rating data, create collaborative filtering DataLoaders, fine-tune. This powers Netflix, Spotify, Amazon.
Text classification – Detect sentiment, filter spam, categorize documents. Organize labeled text, create text DataLoaders, use a text classifier (pre-trained on Wikipedia), fine-tune to your specific task.
Different domains, same structure. The pattern is portable.